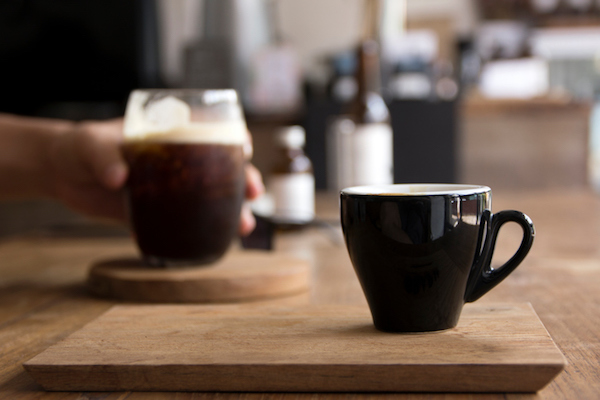
House-made Cold Brew Coffee (Stirred then Shaken)
If you love coffee and you can't get enough, try this do it yourself cold brew method.
If you’re a coffee drinker (like me), you typically fall into one of the following three coffee drinking categories:
- You like to dabble here and there (on a lunch date or after dinner)
- One cup (or two… or three) gets you through the day
- You absolutely love coffee and you can’t get enough of it
Maybe there’s somewhere in between? As for myself, I might come off like I belong in the third category, but I’m actually in the second. One or two cups will get me through my day. Now, this may have something to do with the rising costs of good coffee, but I don’t think I’ll ever do more than two cups (mugs, tumblers, containers, etc.) regardless of my wallet size.
The Coffee Ritual:
If you’re in one of the above categories, you probably have a coffee ritual whether you know it, or not. Which of the following sounds like you?
- You grab coffee on the go at Starbucks (or someplace similar)
- You prefer a craft coffee shop (something a bit more intriguing – like Blue Bottle or Cafe Grumpy)
- You use the cost effective DIY method (Do It Yourself)
As for myself, I’m in the second category once again. I enjoy really good coffee, and really good coffee comes from craft coffee shops (IMO). But recently, I’ve been experimenting with home brews. The results haven’t been so bad and my wallet’s been thanking me. It’s definitely a cost effective option because I get a few days worth of coffee for the cost of one cup at the craft shop. It’s also somewhat of a time saver because I start the process the night before. When morning comes, I just grab my tumbler out of the fridge and head out the door.
If you like cold brew, or you don’t mind switching to cold brew (for the summer, let’s say), give this recipe a try.
Ingredients:
DISCLAIMER – This cold brew recipe works best with a Chemex pot and Chemex pre-folded coffee filters. If you already own these, your cold brew should come out next to perfect. If you don’t own a Chemex pot and its associated filters, try the following method since I can’t (in good conscious) recommend dropping $50 on a coffee experiment.
- 3 Large mason jars (32 oz.)
- 1 Small mason jar (16 oz.)
- 2 Rubber bands (just hear me out)
- 1/2 cup of organic coffee (course grind)
- 3 cups of filtered water
- Ice (as much as you’d like)
- Half & half (you be the judge)
- Stevia (at least 2 or 3 tiny spoonfuls)
- 1 Teaspoon cinnamon
- 1 Cheesecloth (to sift the coffee from one mason jar to another)
Instructions:
First off, make sure your coffee beans are ground as much as possible. You can do this at home with a coffee grinder, or you can do it at the grocery store. You can also purchase coffee that’s already finely ground.
The Night Before:
Take one large mason jar and fill it with 1/2 cup of coffee grinds and three (3) cups of water (preferably filtered).
Now, this may sound strange at first, but yes, you will be mixing up the coffee grinds with the water in the first mason jar. That said, make sure the coffee grinds are completely soaked. The end result should look like a mason jar full of mud. If stirring is necessary (which it is), try to use a wooden spoon for flavor purposes.
When finished with this process, put the first mason jar in the fridge and leave it there over night. If somebody else questions the contents of your refrigerator, tell them to relax. The jar of mud will be gone in the morning.
The Next Day:
It’s time to strain the cold brew.
Appropriately place cut portions of your cheesecloth over the second AND third mason jars. Then, use your rubber bands to tie the cheesecloths into place. From there, make sure the cheesecloths droop down into the mason jar to avoid spillage. You should now have two empty mason jars with cheesecloths secured over the openings.
Next, SLOWLY (and I do mean SLOWLY) pour the coffee from the first mason jar into the second mason jar. To avoid a mess, do this in segments because coffee grinds WILL accumulate on the cheesecloth. Try to be as careful as possible to ensure most of coffee gets into the second mason jar.
When finished, you may notice that a decent amount of coffee grinds made it into the second mason jar. The cheesecloth filtered out most of the grinds, but it didn’t get the job done completely. Here’s where the third mason jar comes into play.
From here, remove the soiled cheesecloth from the second mason jar and throw it away. Then, SLOWLY pour the contents of the second mason jar through the cheesecloth of the third mason jar. Once again, perform this process in segments to avoid a mess. This should remove most of the remaining grinds from the cold brew.
When finished, there still may be some grinds left in the third mason jar, but not enough to ruin the process. It’s really the best you can do without a Chemex pot and filters unless you want to add a fourth mason jar.
Lastly, add ice, half & half, stevia and cinnamon to the small mason jar and pour the cold brew over top. There should be enough for two 16 ounce pours. Keep in mind, a slow pour will leave any excess grinds at the bottom of the jar.
Cover the top of the small mason jar with its lid and close firmly. Proceed to shake away to your heart’s content. When finished, remove the lid and add a straw.
ENJOY !!


